- geoDB Extension (database manager)
geoDB Extension (database manager)
This extension allows users easy, standardised access to geographic databases from different providers. At present, gvSIG supports the following database management systems:
| Data bases | Read | Write |
|---|---|---|
| PostgreSQL/PostGIS | Yes | Yes |
| MySQL | Yes | No |
| HSQLDB | Yes | No |
| Oracle (SDO Geometry) | Yes | Yes |
gvSIG stores the different connections made during the various sessions. Thus, users do not need to input the parameters of every server they connect to. Likewise, if a project file is opened which has a database connection, the user will only be required to enter the password.
The extension has two user interfaces, one to manage the data sources and another to add the layers to the view.
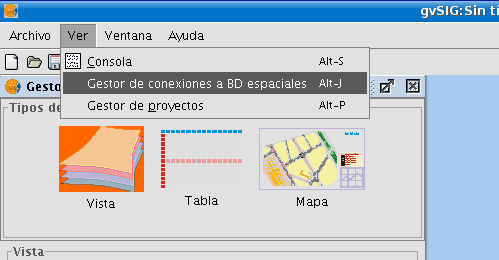
Select the menu See – Spatial database connection manager (figure 1) to open the dialogue box which allows you to add, remove, connect and disconnect the connections to the different types of databases containing geographic information. If you have already used this manager in an earlier gvSIG session, the previous connections will appear (figure 2). If not, the dialogue box will be empty.
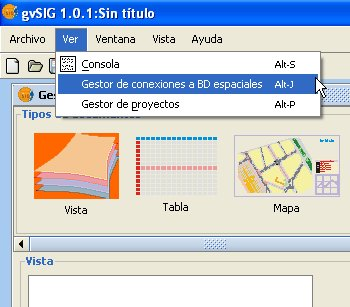
Figure 1. Access to the geoDB connection manager
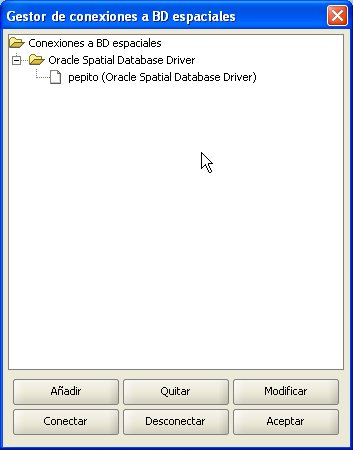
Figure 2. The connection manager
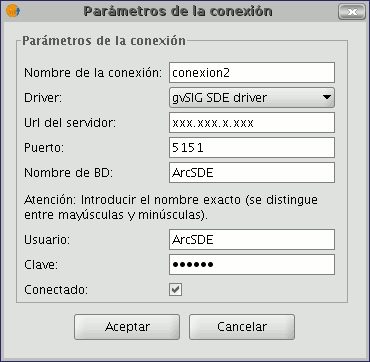
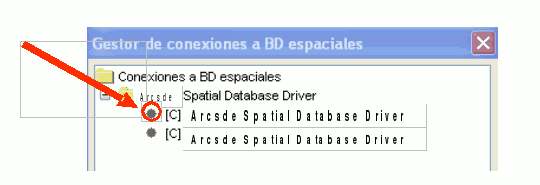
Click on Add to introduce the parameters of a new connection (figure 3). NB: From gvSIG version 1.1 onwards, it should be noted that the name of the database must be written correctly and that it is case sensitive. If you wish to open a project saved in a version prior to gvSIG 1.1 which includes layers belonging to a database whose connections have not taken this factor into consideration, the data must be recovered by reconnecting to the original data base. You can either connect there and then or remain offline. Open connections appear with a link and with “[C]” before their name (figure 4). If you wish to open a connection, select it and click on Connect. You will be asked to enter the password (figure 5) and the connection will then be made.
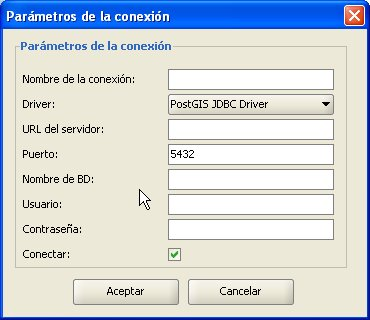
Figure 3. Adding a new connection
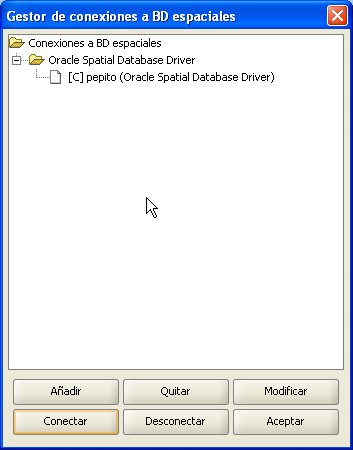
Figure 4. The connection has been made
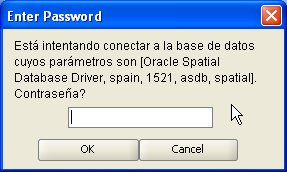
Figure 5. Password request
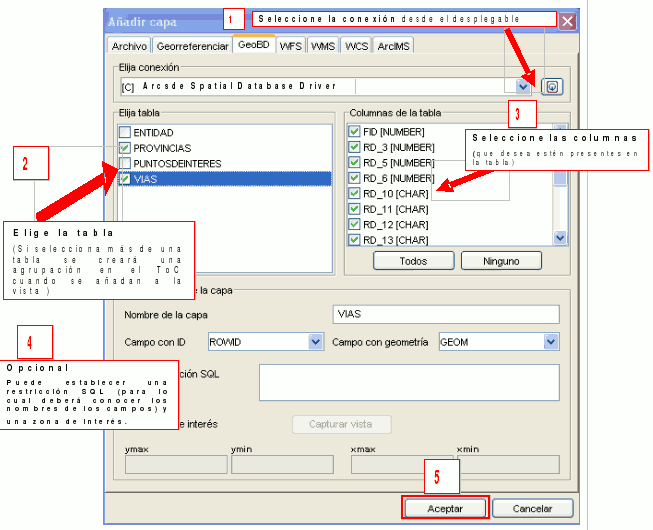
In the Project Manager, create a new view and open it using the New and Open buttons. Use the Add layer icon to add a layer to the view. Go to the GeoDB tab in the dialogue box to add a new layer of this type (figure 6). You must choose a connection (if you select one which is disconnected, you will then be asked to enter the password), select one or more tables and the attributes you wish to download from each layer and, optionally, set an alphanumeric restriction and an area of interest. You can give each layer a different name to that of the table. Click on Ok to view the table’s geometries in the view. This window also allows you to specify a new connection if the database is not registered in the data source catalogue. Any alphanumeric restriction must be introduced by means of a valid SQL expression which is attached as a WHERE clause to each call to the database. Given that the table may take several seconds to load, a small icon appears next to the name of the table indicating that this process is underway. When the table has been loaded, the small blue icon disappears and the gvSIG view is automatically refreshed to allow the geometries to be viewed.
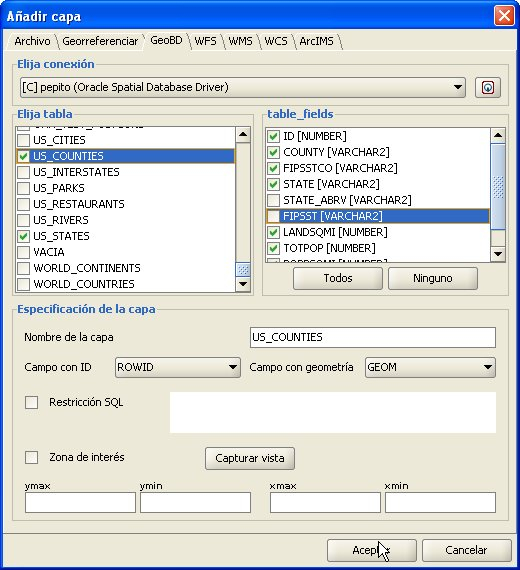
Figure 6. Adding a geoDB layer
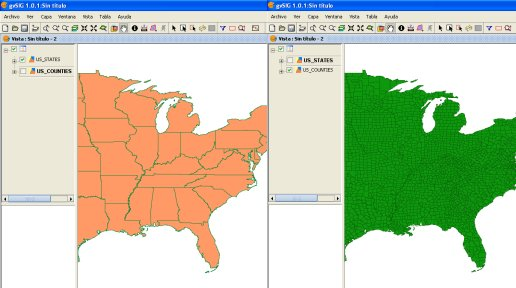
Figure 7. Views with geometries from a geographic database
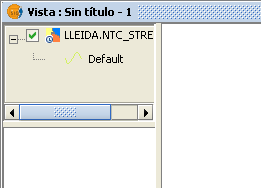
Figure 8. Mini icon showing layers are loading
This function allows new tables to be created in the spatial database from any vectorial source in gvSIG. These tables can be created as follows:
- Create a vectorial layer of any type, for instance by opening an SHP file using the Add layer button (figure 9).
- Select the layer by clicking on its name in the left-hand side of the screen (figure 10).
- In the Layer – Export to menu, select the type of database you wish to export the layer to. The example shows an Oracle database (figure 11).
- You will then be asked to introduce the name of the table which will be created in the database (Oracle) and whether or not you wish to include the newly-created layer in the current view.
If all goes well, the new vectorial geoDB layer will appear in the view and you will be able to work with it in the usual way.
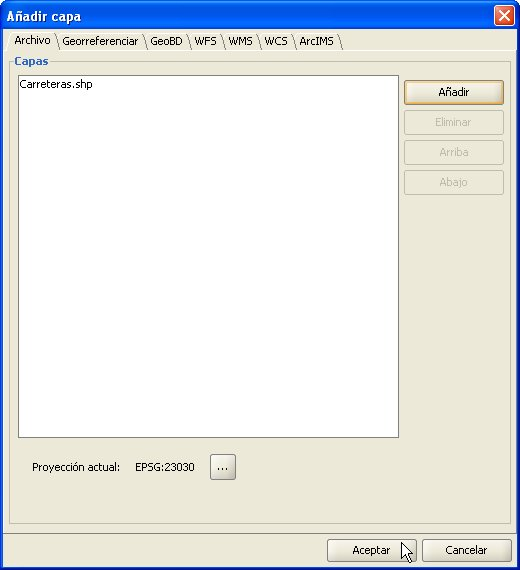
Figure 9. Adding a vectorial layer
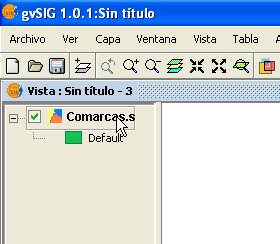
Figure 10. Selecting the layer to export
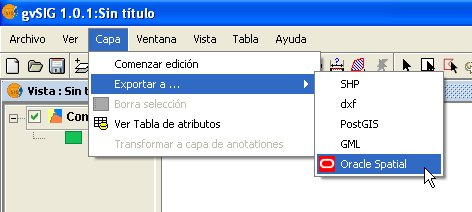
Figure 11. Exporting to Oracle Spatial
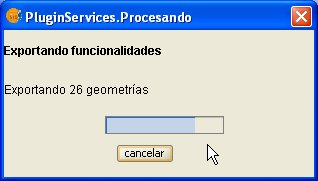
Figure 12. Export progress bar
These notes supplement the documentation for the geoDB extension with regard to the driver for Oracle Spatial.
This driver allows access to any table from an installation of both Oracle Spatial and Oracle Locator (in both cases from version 9i onwards) which has a column that stores SDO-type geometries.
The driver only lists tables which have their geographic metadata in the USER_SDO_GEOM_METADATA view.
Given that each table’s metadata is available, the interface makes use of that data and automatically presents the column (or columns) of geometries. Likewise, ROWID, which is a unique descriptor for each row used internally by Oracle, is used and this ensures that identification is correct.
Two and three-dimensional data of the following types are supported:
- Point and multipoint
- Line and multiline
- Polygon and multipolygon
- Collection
At present, layers in LRS format (Linear Referencing System) are not supported.
Oracle has its own system for cataloguing coordinate and reference systems. Miguel Ángel Manso, on behalf of the Polytechnic University of Madrid, has provided a list of equivalent values for the Oracle system and the EPSG system and this is included in the driver as a DBF file.
Conversions from one coordinate system to another are carried out by gvSIG since its performance has proved to be superior.
The driver constantly performs geometric requests (in other words constantly calculates which geometries intersect with the current gvSIG view) and it is therefore essential that the database has a spatial index linked to the column in question.
If this index does not exist, an error window appears (figure 1) and the table or view cannot be added to the gvSIG view.
In addition, the driver needs to set a unique identifier for the records of the table or view, and this is not possible for certain types of views. If such a problem occurs, it will be detected by the driver and an error message will also appear (figure 2).
As a result, the view cannot be loaded to gvSIG from the database.
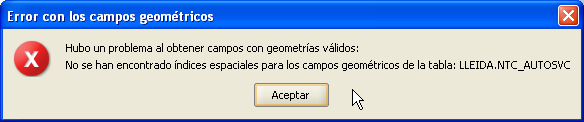
Figure 1. Warning regarding the lack of a spatial index
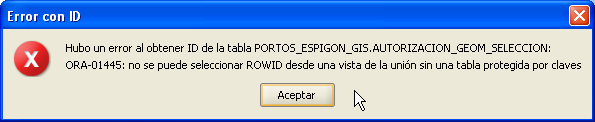
Figure 2. Warning regarding the fact that a ROWID could not be obtained
If you wish to export a layer to an Oracle database, you will also be asked if you wish to include the view’s current coordinate system in the table at the end of the process described in the manual. This may be useful in cases where we do not wish to include such information in the table for reasons of compatibility with other applications or information systems.
To work with two Oracle geometries (the most common case is an intersection), the two geometries must have the same coordinate system. Each geometry has an SRID field which can have the value NULL.
For instance, if we have a table with geometries in EPSG:4326 (Oracle code 8307) and another with geometries in EPSG:4230 (Oracle code 8223), it will not be possible to carry out SQL instructions to perform calculations directly between the geometries of one table and another. However, if these tables’ geometries do not have a coordinate system (i.e. SRID is NULL), then operations can be performed between the geometries of these tables, bearing in mind the errors involved in carrying out intersections between different coordinate systems.
When reading a table whose geometries have a coordinate system set at NULL, it is understood that the user will make sure that the geometries are appropriate for the current view, since no reprojection is possible (this may change with the new gvSIG extension for the advanced use of coordinate systems).
In short, not storing the coordinate system allows for a more flexible use of geometries.
If you have previously used the connection manager in a previous gvSIG session, the connections will have been preserved. Otherwise, it will be empty:
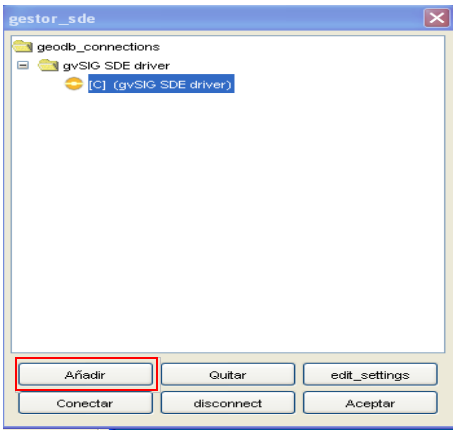
Click "add" and a window that allows you to enter new connection parameters will show up. Fill the data fields and click "OK". Note: In the drop-down selections of “Driver” select the one that corresponds to "gvSIG SDE driver", as shown in the image.
Once the connection is validated, it brings back the "connection manager" with the new database in the list. If in the connection settings window the "connected" box is left checked, the connection will remain open. Open connections are marked "[C]" before its name.
If you want to disconnect the connection click on "disconnect" at the bottom of the manager. The connection will stop at the time, but the parameters will remain recorded for future connections. If you want to open a connection that is already included in the list for having been previously used, you must select it and click "Connect". It will ask for the password again in a window like in the following figure represents and the connection will be open.
Choose the menu "View / Spatial BD connection manager" to open the dialogue that lets you add, remove, connect and disconnect connections to different types of databases with geographic information:
Once we have established the connection to the server, we can begin to query information from it.
For this we will open a view and press the button "Add layer".

Then select the GeoBD tab.
. In the dropdown list you can select your connection. The button to the right side of the box can take you directly to the connection settings window, in case you want to add a connection in some other time without having to go through the connection manager.
. Once the connection is established you will see a list of the available information that can be added to gvSIG.
. From this window you can query or create filters (SQL restrictions) before adding the information.
. Once you select the information you want, click "OK" and it will upload into the view.